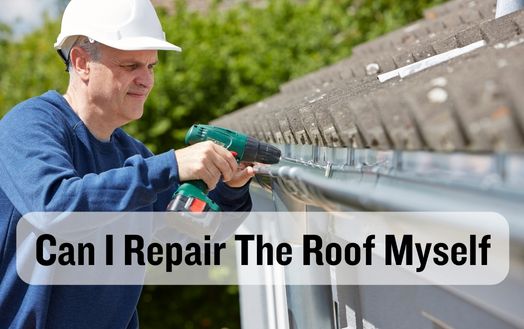
I stood in my backyard, looking up at the weathered roof, and wondered: can I repair the roof myself? The prospect of such a huge task was exciting and terrifying. With guidance and determination, could I save time and money on a professional? It turns out that the answer is more complicated than it seems.
I checked every section for wear, leaks, and missing shingles to assess roof damage. I wanted to assess the damage before deciding on roof repair steps because I value innovation and taking charge. Identifying the extent of roof damage is crucial to deciding whether simple repairs are doable by DIYers or require roofing specialists.
I found several damaged shingles that needed immediate repair during my inspection. These cracked, curled, or missing shingles exposed the underlying structure to leaks and further damage. The problem needed immediate attention to avoid escalation.
To fix the damaged shingles, I researched innovative repair methods and materials that would last. I wanted to make sure my repairs fixed the problem and protected against future damage. Through my research, I discovered advanced adhesive solutions and durable replacement shingles that could withstand the elements and provide a seamless, attractive finish.
Assessing the roof damage was crucial, but I knew repairs required careful planning. I was confident in my abilities, but I knew I needed roofing professionals for the best results. Their expertise could help me choose the best repair methods and avoid pitfalls.
After assessing the roof damage, I needed to know the full repair scope. Understanding what needed to be done helped me decide if I could do the repairs myself or needed professional help.
I checked the roofing material for damage first. Roof replacement may be necessary if the damage is extensive and the roof is old. If the damage was limited to a few shingles or small areas, minor repairs may be possible.
Next, I assessed the roof’s condition. A professional roofer should be consulted if there is widespread deterioration or water leaks. However, I could repair the roof myself if the damage was isolated and it was generally in good condition.
Long-term roof maintenance was important, along with immediate repairs. Roofs need regular maintenance to last and prevent damage. This may involve cleaning the gutters, inspecting for damage, and fixing minor issues immediately.
Understanding the repair’s scope helped me decide whether to hire a professional or do it myself. When it comes to roof repairs, safety and quality are always important, and if you’re unsure of your abilities or the job’s complexity, seek professional help.
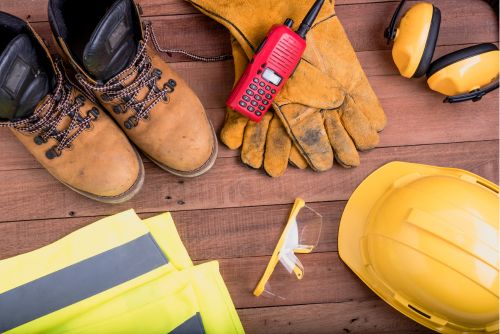
After assessing the repair, the next step was to gather the necessary tools and materials. I knew that having the right tools and materials was essential for roof repair when I started DIY roofing.
First and foremost, I needed enough shingles. These were my roof’s main weatherproofing materials. I chose long-lasting, high-quality shingles. This ensured my repair job would last for years.
The repair required shingles and several tools. A sturdy ladder was needed for roof access. A hammer, nails, and pry bar helped me remove damaged shingles and install new ones. A utility knife helped trim the shingles. I wore goggles, gloves, and a hard hat for safety.
For larger repairs, I bought a roofing nail gun. It was faster and more efficient with this innovative tool. Easy handling reduces repair fatigue due to its ergonomic design. It revolutionized DIY roofing and made it more fun.
I took several safety precautions before starting the roof repair to protect myself. I took these safety measures:
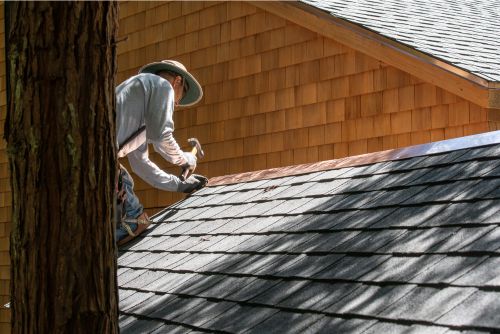
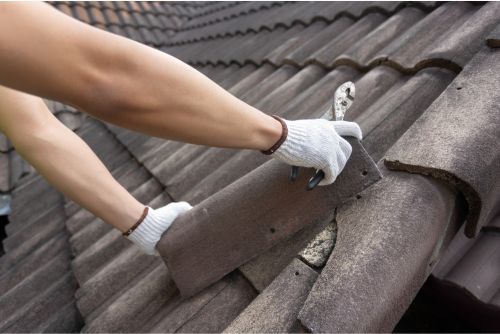
I use a pry bar to lift the damaged shingles without disturbing the rest. DIY roof repair requires roofing knowledge to remove damaged shingles.
You can save money and time by doing this yourself with the right tools and techniques. You should always seek professional help if you’re unsure or uncomfortable with the process.
First, I inspect the damage and identify the shingles to be removed. I gently lift the damaged shingles with the pry bar, not damaging the neighbors. I can loosen the roof nails holding the damaged shingles by applying even pressure and a steady hand. I carefully remove the nails from the shingles, keeping them separate.
Next, I carefully slide the damaged shingles out from under the intact ones. If the shingles are stuck, I may need to use more force, but I always proceed carefully to avoid injury. After removing damaged shingles, I check the area underneath for water damage or other issues that may need repairs.
Removing damaged shingles is essential to roof repair. You can complete this DIY project by following the steps and paying attention to detail. However, if you lack roofing knowledge or are uncomfortable with the process, hire a professional to ensure a safe and proper job.
Continuing the roof repair project requires repairing or replacing flashing to maintain roof integrity. Any roof needs flashing to prevent water from entering vulnerable areas and causing damage. Important flashing repair considerations:
Leaks and water damage must be repaired to ensure roof durability and functionality. Preventing further damage and costly repairs requires immediate leak and water damage repair. Roof maintenance requires proactive water damage detection.
Innovative roof sealants and coatings can prevent leaks and water damage. These products protect the roof from water penetration. These sealants can prevent water damage and extend roof life by sealing flashing and roof joints.
Check your roof regularly for water damage. Check for ceiling water stains, peeling paint, and damp walls. These indicate roofing issues that require immediate attention. Early detection and repair can prevent further damage and costly repairs.
Leaks and water damage must be repaired immediately. Locate the leak and patch it with roofing cement or sealant. If the damage is extensive, shingles or roof sections may need to be replaced.
Repairing small roof holes and cracks requires the right patching materials and application methods. Roof maintenance requires minor repairs to prevent further damage. Here are some tips for fixing small cracks and holes:
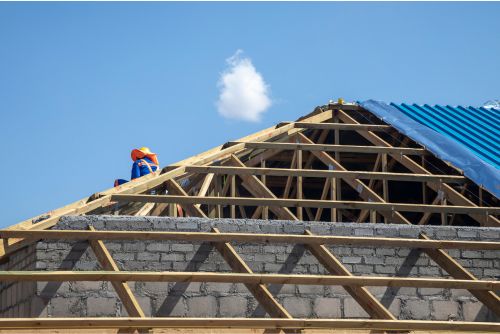
Assessing the framework’s stability and integrity helps me fix roof structural issues. The roof must be both attractive and structurally sound when fixing structural issues.
Inspection of the framework helps me find weak spots or damage that could compromise the roof’s stability. I’ll start by inspecting the support beams and trusses for sagging or damage. To avoid further damage and collapse, structural issues must be addressed immediately. I’ll reinforce or replace any problem areas, depending on the damage.
I’ll also check the roof decking for rot and water damage. These issues can weaken the roof’s structure, causing future issues. To maintain roof stability, I’ll repair or replace damaged decking immediately.
While I’m confident in my structural repair skills, some repairs may require a roofing contractor. For instance, extensive damage or complex structural issues may require professional help. An experienced roofing contractor can repair the roof and ensure its long-term stability.
Rotten wood or plywood found during the inspection must be replaced immediately to maintain the roof’s structure. Neglecting this crucial step can cause more damage and costly repairs. When replacing rotten roof wood or plywood, remember these tips:
Let’s keep on answering the question: can I repair the roof myself? A roof sealant or coating is essential for a professional, long-lasting roof repair. DIY enthusiasts like me are always looking for new ways to make minor roof repairs easier. Roof sealant serves that purpose.
The specially formulated roof sealant adds another layer of protection. It blocks water, UV rays, and other elements that can damage your roof. You can prolong the life of your roof and avoid costly repairs by sealing it.
Roof sealant’s ease of use is great. With a few basic tools and some DIY know-how, you can complete this task by yourself. Clean your roof thoroughly to remove debris that may hinder sealant adhesion. Apply sealant evenly to your roof with a brush or roller. Pay special attention to seams and flashing, which can leak.
Let the sealant dry before exposing your roof to the weather. This gives the sealant time to bond with your roof and provide maximum protection. To get the best results, follow the manufacturer’s application and drying instructions.
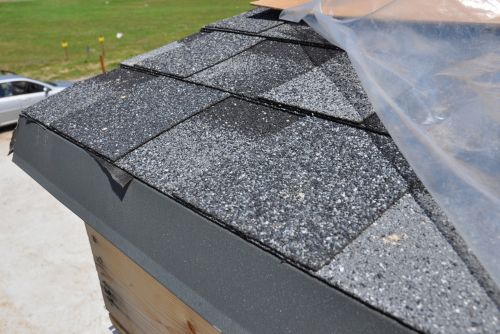
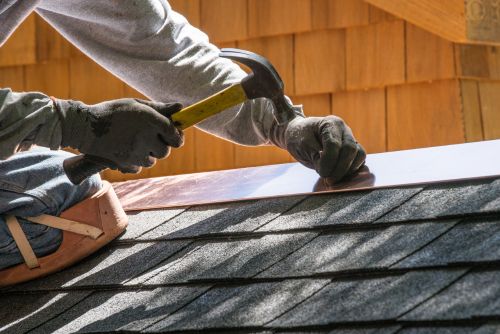
After applying roof sealant or coating, I install new shingles to repair the roof myself. This is crucial to roof longevity. New shingles can be installed with the right tools and techniques for replacement or minor repairs. Here are some important shingle installation steps:
My roof repair project taught me the importance of nailing shingles. Installing new shingles or replacing damaged ones requires the right technique and tools for a durable roof. Selecting the right roofing nails is crucial to properly nailing shingles.
Shingles must be secured to the roof deck by roofing nails. Nail type and length are crucial for the job. Nails too short may not penetrate the shingles and roof deck, while nails too long may damage or leak. I learned that galvanized roofing nails are best for roof integrity because they resist rust and corrosion.
Nail placement is crucial to properly nailing shingles. The nails must be properly positioned to secure the shingles. The nails should go through the shingle tabs 1 inch above the cutout and 3/4 inch from each side. This placement maximizes stability and prevents shingle lifting in high winds or rain.
To ensure consistency and avoid future issues, use the same nailing techniques when making minor repairs. Well-nailed shingles improve the roof’s appearance and durability.
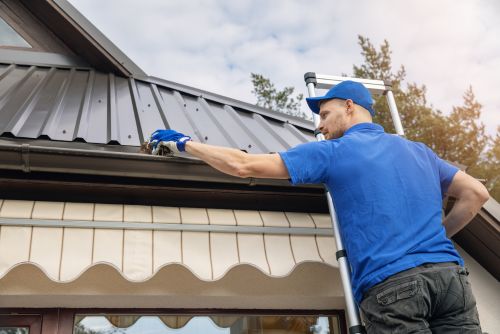
Gutter inspection and cleaning are the next important steps in roof maintenance. Maintaining gutters is crucial for roof health and damage prevention. Here are some gutter inspection and cleaning tips:
Roof repairs are sometimes best left to the pros. It may be tempting to fix the roof yourself, but sometimes hiring a pro is better. DIY roof maintenance and minor repairs are possible. When problems are complex or require extensive work, call in the experts.
Homeowners with basic DIY skills can replace shingles or fix a leak. Knowing your limits is crucial. Contact a professional if you’re unsure what to do or lack the necessary tools and equipment. They have the skills to find and fix the problem’s cause for a long-term solution.
Professionals are also needed for major roof repairs or replacements. Most homeowners lack the expertise and equipment for these tasks. Doing such projects yourself can lead to costly mistakes and roof damage.
In conclusion, while it may be possible to repair a roof yourself, it’s important to assess the damage, understand the scope of the repair, gather the necessary tools and materials, take safety precautions, remove damaged shingles, install new shingles, properly nail them in place, and inspect and clean gutters.
However, it’s crucial to know your limitations and when it’s best to call a professional for assistance to ensure the job is done correctly and safely. Finally, we have answered the question: can I repair the roof myself?
While waiting for repairs, I can take proactive steps to prevent further damage to my roof. First, I should inspect the roof regularly to identify any potential issues. Next, I can remove any debris or branches that may have accumulated on the roof. Additionally, I can temporarily seal any leaks or cracks using roofing cement or a waterproof sealant. It’s important to prioritize safety and consult a professional for a thorough and lasting repair.
There are temporary fixes you can try to stop a leak in the meantime. First, locate the source of the leak and clear any debris around it. Then, apply roofing cement or a patching compound to seal the area.
Additionally, you can use a tarp or plastic sheeting to cover the damaged part of the roof until repairs can be made.
If I accidentally damage the roof while repairing it, I’ll assess the damage first. I’d then stop the repair and cover the area with a tarp or plastic sheet to prevent further damage. Next, I’d hire a roofing contractor to assess the damage and offer advice.
Roof repairs require safety and professional advice.
I can definitely repair the roof myself. It’s a great opportunity for me to learn and apply my DIY skills. Plus, it could save me some money.
However, it’s important to consider the complexity and safety risks involved. If it’s a simple repair like replacing a few damaged shingles, I feel confident in doing it myself. But for more extensive repairs or if I’m unsure, it’s best to hire a professional to ensure it’s done correctly and safely.
How often should I clean and inspect my gutters for roof health? To keep your roof healthy, check and clean your gutters regularly. Clogged gutters can damage your roof and cause water damage if neglected.
Gutter inspection and cleaning should be done twice a year, especially before the rainy season. This simple step can prevent costly repairs and extend the life of the roof.
