I know what you’re thinking: roof renovation sounds like a daunting task, and you might be wondering where to even start. But fear not, because I’m here to guide you through the step-by-step process of transforming your roof into a sturdy and beautiful structure.
From the initial inspection to the finishing touches, each stage plays a crucial role in ensuring the success of your renovation project. So, let’s dive in and explore what are the steps in roof renovation, and by the end, you’ll have a clear understanding of what it takes to achieve a top-notch roof renovation.
A thorough roof inspection is necessary before starting any roof renovation project to determine its condition and potential issues. This step is essential for renovation success. Hiring a professional contractor to inspect your roof is recommended for innovative homeowners who want to improve its functionality and aesthetics.
A roof inspection thoroughly examines your roof’s structure, materials, and condition. The contractor will carefully inspect your roof’s shingles, gutters, flashing, vents, and other components. They’ll check for cracks, leaks, and loose tiles and evaluate the roof’s integrity.
The contractor will also find any issues during the inspection before starting the renovation. This may include roof insulation, ventilation, or drainage issues. Early detection of these issues can prevent costly repairs and ensure the longevity of your newly renovated roof.
The contractor will provide a detailed report with their findings and recommendations after the roof inspection. This report will guide roof renovation steps. It will help you choose renovation materials, methods, and timelines.

To efficiently renovate the roof, I’ll start planning and designing. This stage is crucial for a successful roof replacement and smooth installation.
The roofing structure’s needs are carefully considered during planning and design. First, the roof is inspected. A thorough inspection of the roofing materials identifies damage and needs. After the assessment, a roof replacement or repairs to extend its lifespan are decided.
Design comes next. Innovation and creativity are crucial. Choosing roofing materials that are durable and attractive is part of the design process. Materials are chosen based on climate, building codes, and architectural style.
The installation process is also determined during planning and design. This requires a detailed timeline, steps, and resource allocation. Efficient project management completes the roof renovation on time and within budget.
The roof renovation requires permits. Permits are essential for roof replacement or renovation. It ensures installation safety and building code compliance. As an innovator who wants a smooth renovation, you must understand permit requirements.
First, learn the local building codes to get permits. This will show you what permits your roof renovation project needs. These regulations must be followed to avoid legal issues and ensure installation safety.
After understanding the permits, fill out the application forms. The project scope, materials, and timeline are usually required on these forms. To speed up permit approval, provide accurate and complete information.
There may be a wait for permit approval after the application. Stay in touch with the local building department and provide any additional information or documentation they may need.
After permits are issued, you can renovate the roof. Displaying permits prominently at the job site ensures compliance and avoids penalties.
Permitting a roof renovation project may seem tedious, but it’s necessary for safety and compliance. By following the steps and providing accurate information, you can get permits quickly and start your innovative roof renovation project.
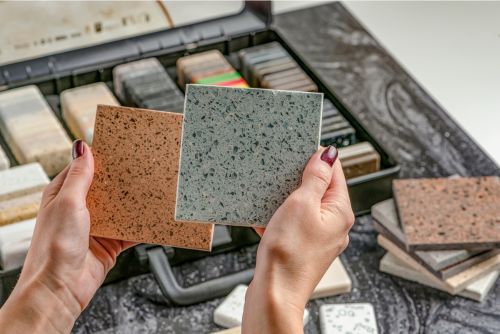
After getting permits for the roof renovation, carefully choose the materials. Choosing the right roofing material is essential for a durable and attractive roof installation. Consider these three innovative roof renovation options:
In today’s environmentally-conscious world, many homeowners are opting for roofing materials that are sustainable and eco-friendly. Materials such as recycled shingles, solar panels, or green roofs not only reduce the carbon footprint but also provide long-term energy savings.
Embrace the future with high-tech roofing materials that offer cutting-edge features. Consider materials like smart roofs, which use sensors and automation to regulate temperature and energy consumption. These roofs can adapt to weather conditions, making them energy-efficient and cost-effective in the long run.
If you’re looking for a material that combines strength and aesthetics, lightweight and durable options are worth considering. Metal roofing, for example, is known for its longevity, low maintenance, and resistance to extreme weather conditions. It also comes in a variety of styles and colors, allowing for customization to match your home’s architectural design.
Consider durability, energy efficiency, and aesthetics when choosing a roofing material. Explore creative, functional, and stylish options. By carefully choosing materials, you’ll get a roof renovation that looks great and lasts.
After choosing materials, remove the old roofing to start roof renovation. This crucial step prepares the foundation for new materials, ensuring a long-lasting roof. Steps that guarantee success must be taken to start the removal process.
Safe work conditions are essential when removing old roofing. To avoid accidents, this requires wearing protective gear and securing the area. Removal can begin after safety is prioritized.
Second, determine the type of old roofing to remove. This will determine task-specific tools and methods. To efficiently remove asphalt shingles, metal roofing, or clay tiles, each material requires a specific approach.
The third step is carefully removing the roofing material after identification. Use pry bars and shingle scrapers to gently remove the old roofing. To avoid structural damage, remove the item carefully.
Old roofing debris must be properly disposed of during removal. Fourth, collect and dispose of debris according to local regulations. Maintaining a clean and organized workplace requires this.
After removing the old roofing, repair any damage to continue the roof renovation process. This ensures that the new roof is installed on a solid foundation, making it an essential step in roof replacement. There are three main roof repair steps:
The drip edge and underlayment for the roof renovation will go first. These steps are essential for the new roof’s durability and efficiency.
Drip edges are metal strips installed along the roof edges to prevent water from entering the structure. It keeps water off the roof and in the gutters. Drip edge installation is simple: measure, cut, and nail or screw the metal strip to the roof edges.
Installing the underlayment is next. Before installing the shingles, the underlayment shields the roof deck. It prevents water infiltration and improves roof performance. Asphalt-saturated felt and synthetic underlayment are available. Roll the underlayment onto the roof from bottom to top, overlapping each row to create a watertight seal.

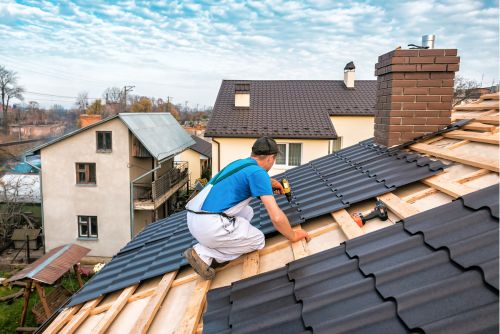
After installing the drip edge and underlayment, apply the new roofing material. This is the exciting part of roof renovation, where your vision becomes reality. There are three novel methods for applying the new roofing material:
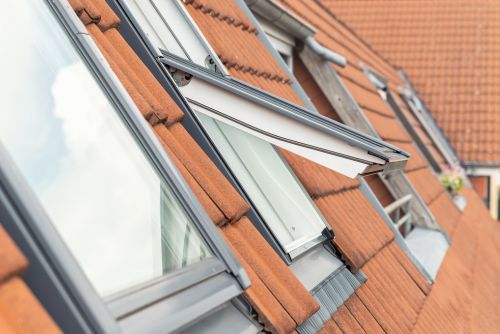
Flashing is essential for roof integrity and waterproofing. The thin, weather-resistant flashing around chimneys, vents, skylights, and dormers prevents water from entering your roof. This barrier keeps water away from these openings and prevents leaks.
Flashing installation is essential during roof renovation. Professional roofing contractors will carefully assess the flashing needs and choose the best type and size. They’ll then install the flashing securely and sealably.
Flashing installation prevents water damage. Flashing protects your roof from costly repairs by directing water away from vulnerable areas. It also reduces drafts and heat loss, improving home energy efficiency.
The latest flashing materials make watertight sealing easier than ever. Flexible materials that conform to irregular shapes and self-adhesive flashing without nails or screws are modern flashing options. These innovations speed up roof installation and improve durability.
Roof renovation requires ventilation installation to ensure airflow and prevent moisture buildup. Maintaining a healthy and durable roof requires proper ventilation. The roof renovation process (what are the steps in roof renovation) requires ventilation installation for three reasons:
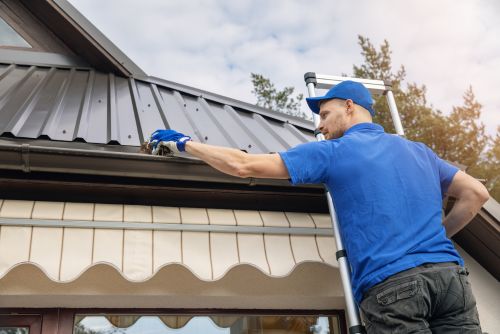
Gutter and downspout installation is crucial to roof renovation. By diverting water from the roof and foundation, gutters and downspouts prevent water damage. This prevents leaks, mold, and structural damage.
Installing gutters and downspouts requires several steps. Check your gutters and downspouts first. They may need repair or replacement if they are damaged or clogged. Measure your roof’s eaves carefully to determine how much guttering you need. Calculate the right pitch for drainage.
After gathering the materials, attach the gutters to the eaves with brackets or hangers. Secure them tightly for stability. Next, strategically place downspouts to direct water away from the foundation. Consider splash blocks or extensions to redirect water flow and prevent erosion.
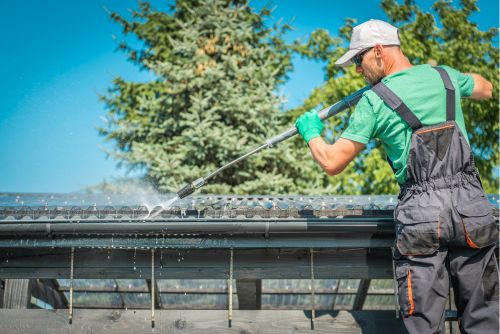
Roof renovation requires a final clean-up after gutters and downspouts are installed. This vital step removes all debris and old materials, leaving the new roof clean and ready. Here are three innovative ways to clean up thoroughly and efficiently:
What should be considered during a thorough quality inspection of the renovated roof? As the roof renovation nears completion, a thorough quality inspection is needed to ensure that all steps have been taken and the final product meets the highest standards. Any renovation project needs a quality inspection to identify and fix any issues before completion.
Several key elements must be considered during quality inspection. The renovated roof’s structural integrity must be assessed first. This includes checking for cracks, leaks, and weather resistance on the roof.
Additionally, we must inspect the roofing materials for quality and proper installation. Workmanship is another important quality inspection factor. This includes checking installation methods for industry standards. We must also inspect the roofing system for visible flaws like uneven shingles or flashing.
A complete quality inspection should also consider contextual factors of the roofing project. If the renovation included solar panels or green roofing, they should be checked to make sure they’re working properly.
Finally, I’ll discuss finishing touches to finish the roof renovation. This step is essential for a beautiful, well-performing new roof. Three creative finishing touches will elevate your roofing project:
Regular maintenance and care for your newly renovated roof are next. After a roof renovation, it’s important to maintain your roofing system to extend its lifespan and avoid future issues.
Your roof needs regular maintenance to stay in top shape. By scheduling regular maintenance, you can catch minor issues before they become major ones. Over time, this proactive approach can save you time, money, and headaches.
Roofing companies that specialize in roof care should be hired for proper maintenance. These experts have the knowledge, skills, and tools to inspect, identify, and fix problems. They can also recommend the best roofing system maintenance methods.
Cleaning debris, checking for leaks, and inspecting shingles or tiles are part of regular maintenance. Also, trim nearby trees to prevent branches from falling on the roof and damaging it.
What are the steps in roof renovation? In conclusion, roof renovation involves several important steps. These include:
By following these steps, homeowners can ensure a successful and long-lasting roof renovation project.
Typically, a roof renovation can take anywhere from a few days to a few weeks, depending on the size and complexity of the project. Factors such as weather conditions and the availability of materials can also impact the timeline.
It’s important to work with a reputable contractor who can provide a realistic estimate and keep you informed throughout the process. With proper planning and coordination, a roof renovation can be completed efficiently and effectively.
Sure, you can install a new roof over your existing one. It’s called a roof overlay or a roof recover. This method can save you time and money because it eliminates the need to tear off the old roof.
However, it’s important to note that this option is only suitable if the existing roof is in good condition and not severely damaged. It’s always a good idea to consult with a professional roofer to assess the feasibility of a roof overlay.
The most common signs of roof renovation are leaks, damaged shingles, and sagging. To avoid further damage, act quickly when these issues arise. Renovating a roof involves inspecting and repairing the structure, replacing damaged materials, and installing new roofing.
On average, the cost of a roof renovation can vary depending on factors such as the size of the roof, materials used, and any additional repairs needed. It’s best to get a few quotes from reputable contractors to get an accurate estimate.
Remember, investing in a high-quality roof renovation can help protect your home and increase its value in the long run. Don’t hesitate to explore innovative roofing options that offer durability and energy efficiency.
During a roof renovation project, there can be several potential risks or challenges. One major risk is the possibility of structural damage that may be uncovered once the old roof is removed.
Additionally, weather conditions can pose a challenge, as rain or strong winds can delay the project and cause further damage. Another challenge is ensuring proper ventilation and insulation, as this can impact the overall energy efficiency of the building.
Lastly, coordinating with contractors and suppliers to ensure timely delivery of materials can also be a challenge.
