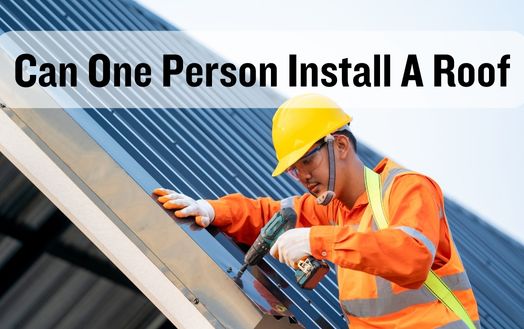
As I stood at the foot of my house, staring up at the roof, I felt like a lonely mountaineer at the base of an unforgiving peak.
I wondered: Can one person install a roof? With each shingle and nail I laid and hammered, I faced challenges and triumphs that tested my physical and mental strength. My friends, the answer lies in both technical skill and individual determination and resourcefulness.
Dear reader, if you want to know the truth behind this daring endeavor, join me as I unravel the complexities and secrets of roof installation one step at a time.
Safety is essential when installing a roof yourself to avoid accidents. Safety should be your top priority during roofing installation. As a one-person roof installer, you must understand the risks and take precautions.
I recommend consulting a professional contractor before starting a roofing project alone. They can advise on safety best practices and offer expert insights. They can also assess your roof’s structural integrity and recommend repairs or reinforcements.
Working at heights requires safety equipment like a harness to prevent falls. Also, use a sturdy ladder. Incorrect tools and equipment can cause accidents, so check them regularly.
Weather also affects the safety of roofing installations. Slips and falls increase in bad weather, so avoid working. Windy conditions make material handling difficult and increase accident risk. Planning your project during stable weather reduces these risks.
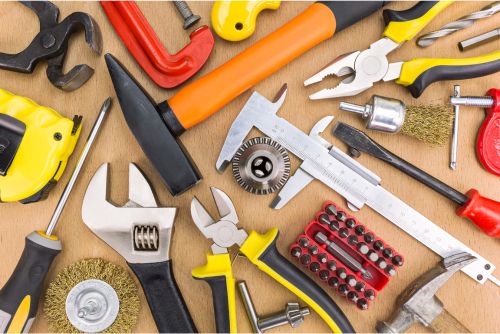
Certain tools are needed for one-person roof installation. Homeowners doing DIY projects need the right tools. A smooth and efficient installation of asphalt shingles or other roofing materials requires the right tools.
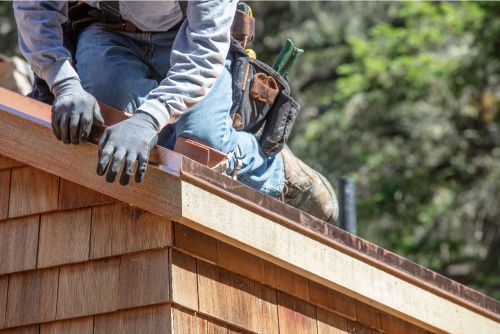
A sturdy ladder comes first. It should be tall enough to reach the roof and stable enough to avoid accidents. Working at heights requires a safety harness and roof brackets. These stabilizers prevent falls and injuries.
Next, get a roofing nail gun. Installing this tool is much faster than hand-nailing. It helps place nails precisely and protects roofing materials.
A good utility knife is also essential for cutting shingles to size and shape. It allows clean, precise cuts for seamless installation. A chalk line for marking guidelines, a pry bar for removing old shingles, a roofing hammer, shovel, and nail puller are also needed.
I prefer high-quality asphalt shingles for my one-person roof installation. Asphalt shingles are ideal for innovative and efficient roof installations due to their many benefits. Asphalt shingles are long-lasting and weatherproof.
Easy installation is a major benefit of asphalt shingles. One-person installers need lightweight, manageable materials. Asphalt shingles meet this criteria, making installation easy. Their flexibility allows them to fit different roof shapes and sizes, ensuring a perfect fit.
The affordability of asphalt shingle roofs is another benefit. Asphalt shingles are cheaper than metal roofing but still high-quality. These are ideal for homeowners who want innovation without breaking the bank.
Asphalt shingles can often be installed over existing shingles, saving time and money on removal. This novel method eliminates roof preparation, speeding up and simplifying installation.
One-person roof installation requires proper roof preparation before starting. As an innovative DIY roofer, you must understand the importance of roof preparation. Your roof replacement or first installation will look professional if you follow these steps.
Gather all job-related materials and tools first. Shingles, underlayment, flashing, and nails are included. Select high-quality materials for your roof type and climate. For sustainability, consider solar shingles or eco-friendly roofing materials.
Check the roof for damage before installation. Check for leaks, rotting wood, and structural issues that could compromise your roof. Repairing these issues beforehand will prevent further damage and prolong roof life. Clear the roof of debris and loose shingles. A clean and smooth base for the new roof will result. Add an underlayment to prevent water infiltration.
Finally, plan your installation accurately. To install the roof efficiently, divide it into sections and work systematically. Install your roofing materials according to the manufacturer’s instructions, paying attention to overlap and sealing.
I gently remove old roof shingles with a sturdy shovel. This step is essential before installing new shingles and laying the groundwork. The removal of old shingles must be done properly to avoid damage to the roof.
First, I check the roof for loose or damaged shingles. This helps me assess the workload and plan. I gently lift the old shingles’ edges with the roofing shovel to loosen them from the roof. Working from the top down, I remove one row at a time. A systematic approach reduces the risk of unnecessary damage. I properly dispose of old shingles. Reusing shingles reduces environmental impact and is sustainable. Recycling conserves resources and reduces waste.
After removing the old shingles, I checked the roof deck for damage or decay. To ensure a long-lasting roof, fix any problems before installing new shingles. I repair or replace the roof deck to provide a solid foundation for the new shingles.
Old shingles must be removed during roof replacement. It starts over and ensures proper shingle installation. A successful and innovative roof installation is possible by following proper techniques and taking care during removal.
To provide waterproofing and protection, the underlayment is carefully installed on the roof. In a DIY roofing project, installing the underlayment alone may seem daunting, but with the right approach, it can be done. We will continue answering the question: Can one person install a roof?
Underlayment is essential to roofing. A secondary barrier prevents water from entering the roof structure. A one-person DIY roofer must plan and prepare before installing. Underlayment rolls, roofing nails, and a hammer should be on hand.
Unroll the underlayment along the roof eaves, overlapping the edge by a few inches. Nail it down 6–8 inches apart with roofing nails. Overlapping each row of underlayment by 6 inches creates a watertight seal.
Work from the bottom up when installing underlayment on a sloped roof. This lets water flow down without getting trapped. Be careful to stay balanced as you climb the roof. Consider a harness or safety ropes for extra security.
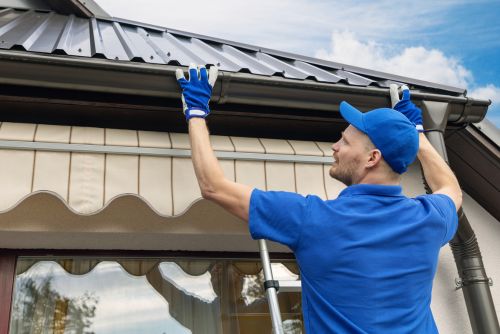
Drip edge installation follows underlayment installation in the one-person roof installation process.
The drip edge protects roof edges and directs water away from the structure, making it essential to roof installation. It also gives the roof a tidy appearance. It’s simple to install the drip edge, but it requires precision. Get the drip edge, roofing nails, and a hammer first. Choose high-quality roofing materials to prolong roof life.
Start by placing the drip edge along the roof eaves, overhanging by an inch. Place the roofing nails 12 inches apart to secure it. Ensure the drip edge is straight and even across the roof.
Repeat the process on the roof’s gable ends. To fit the edges precisely, trim the drip edge. Be patient and fit properly to avoid water damage and roofing repairs.
I carefully position the roof flashing along vulnerable areas to prevent water infiltration. One person can install roof flashing efficiently and effectively with the right techniques and tools. I found a way to install roof flashing myself as an innovative DIYer.
I start by gathering roof flashing, nails, a hammer, and a ladder. After gathering these items, I begin installation. I attach flashing to the roof edges, overlapping the shingles and extending at least 4 inches up the wall. This watertight seal prevents leaks.
I drive roofing nails through the flashing and into the roof deck to secure it. I evenly space nails 6–8 inches apart. This securely attaches the flashing to withstand harsh weather.
As a solo installer, I use agility and balance to navigate the roof. I carefully install each flashing piece. I can install the roof flashing myself with patience and precision.
Despite its difficulty, one person can install roof flashing with the right attitude and approach. Following these steps and taking precautions will protect my roof from water infiltration and damage.
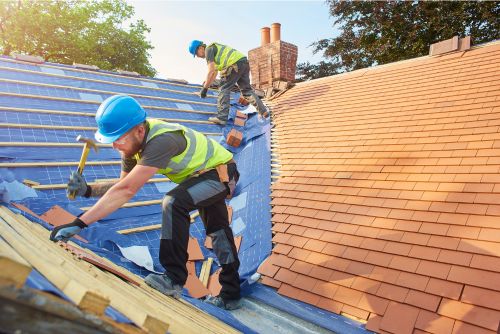
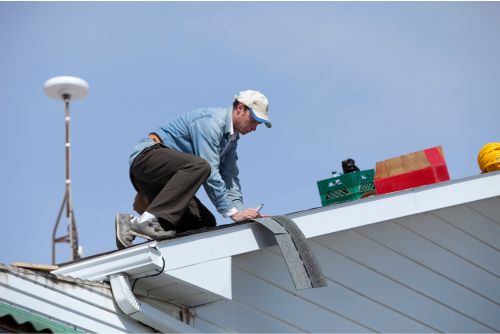
After installing the roof flashing, carefully nail the shingles. Nailing shingles is essential to roof installation. One person can now complete the task that previously required a roofing professional thanks to innovative techniques and tools.
Use the right materials to nail shingles. A sturdy roof requires good roofing nails. These nails are made to withstand the elements and secure the shingles. It’s important to choose the right length for the shingles being installed.
Use a shingle-specific nail gun for precision and accuracy. These tools speed up and simplify the process, making solo work more efficient. They also prevent injuries and ensure nail placement.
Innovative roofing companies have simplified shingle installation with new systems. These systems have nail-free, self-adhesive tabs. Although they are more expensive, these systems are more convenient and save time during installation.
Cutting and fitting shingles is essential for a secure roof installation. DIY roofing jobs like installing asphalt shingles require this step even more. As a solo installer, I understand the need for efficiency and creativity.
Planning and precision are needed to cut and fit shingles. The shingles must be measured and marked before installation. This step ensures a perfect shingle fit and reduces waste. I easily make clean, precise cuts with innovative tools like a roofing square and a utility knife.
Next, install the shingles. This requires shingle alignment and nailing. As a one-person installer, I’ve developed innovative methods to streamline the process. I can position the shingles without help using a magnetic nail holder. I also find that organizing the shingles saves time during installation. I can quickly find the right shingles by grouping them by size and shape.
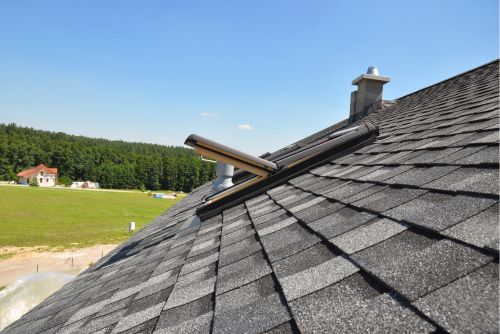
Proper roof ventilation requires ridge vent installation. Proper ventilation prevents moisture and heat buildup, extending the life and efficiency of the roof. I’ve installed ridge vents on my roofs as a DIYer, and it’s easy. Ridge vent installation is easy for one person for three reasons:
Safety and sealing are crucial when installing chimneys and skylights. A successful roof installation depends on these elements. As an adventurous homeowner, I wanted to install these features myself. I understand the risks and importance of professional roofing work.
Chimneys must be properly integrated into the roof. Creating a watertight chimney base seal and flashing prevents leaks. Smoke and gas issues can be avoided with proper ventilation. It may be tempting to do this alone, but a professional can ensure your roof’s structural integrity.
Another exciting roof addition is skylights, which let natural light in. However, improper installation can cause leaks and structural damage. The right skylight for your roof and proper sealing are essential. A professional can recommend a location and sealant methods. They can also secure the skylight to prevent wind and rain damage.
Regular maintenance keeps your roof in top shape and extends its lifespan. As a roof installer, I know how important roof maintenance is to its longevity. Three novel roof maintenance methods will save you money on future repairs and keep your roof in good condition:
Roof maintenance takes time and effort. One person can efficiently install a roof using innovative methods. The size and complexity of a one-person roof installation determine its time and energy requirements.
A one-person roof installation may take longer than a team of professionals. However, using efficient tools and streamlined processes can reduce installation time. Lightweight roofing materials and advanced equipment can make single-person installation faster and easier.
Energy is another important factor when installing a roof alone. Physically demanding work requires strength, balance, and endurance. Modern ergonomic tools and equipment can reduce body fatigue. Strategic planning and time management can spread the installation process over manageable periods, allowing for rest and recovery.
Although it takes longer and requires more energy than a team effort, installing a roof alone is possible. One person can install a roof with the right mindset, innovative tools, and efficient methods. Prioritize safety, take breaks, and ask for help with heavy or complicated tasks.
One-person roof installations can save money by using cost-effective methods and innovative materials. Here are three ways to save money when roofing alone:
In conclusion, while it’s possible for one person to install a roof, it requires careful consideration of safety, the right tools, and knowledge of roofing materials and techniques. It’s also important to factor in the time and energy required for the job. However, by doing it yourself, there’s potential for cost savings.
It’s always recommended to consult with professionals if you’re unsure or have limited experience in roofing installation. So now we’ve finally answered the question: Can one person install a roof?
How much experience is needed to install a roof yourself?
Well, I can tell you from personal experience that it definitely helps to have some background knowledge. While it’s technically possible for one person to install a roof, it can be a challenging and time-consuming task.
Having prior experience or training in roofing techniques can make the process smoother and ensure that the roof is installed correctly. However, with the right tools, determination, and some research, it’s possible to tackle this project solo.
Roof installation must comply with building codes. The safety and structural integrity of the roof are crucial. Roof installation codes vary by location and type.
Before installing, you must research and understand these requirements. Building code compliance ensures roof safety and prevents legal issues.
Roof installation without professional help is dangerous. Falls from heights, heavy materials, and improper installation can cause leaks or structural damage.
A successful installation requires skills, knowledge, and safety equipment. We recommend hiring roof installation experts to reduce risks and ensure a safe and reliable roof.
Installing a roof can be done in stages if necessary. It doesn’t necessarily have to be completed all at once. This flexibility allows for more efficient and manageable installation, especially for one person.
When installing a roof yourself, consider the weather. Avoid these conditions for a successful installation. Rain or strong winds can make the process dangerous and difficult.
Roof work is best on calm, dry days. One person can safely and efficiently install a roof by considering the weather.
